
前言
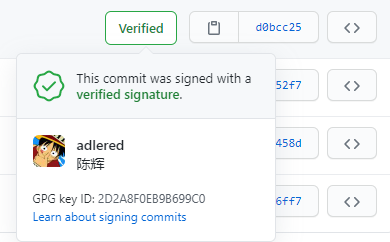
为 Git 设置一个 GPG 密钥后,将在每次 Commit 时确认你配置的密码,并在 GitHub 的 Commit 中显示 Verified 标识,以此标记这个 Commit 确实是由你本人完成的,而不是其他人的假冒。
教程
系统环境
操作系统版本:Windows 10 X64
使用的IDE:Intellij IDEA
安装
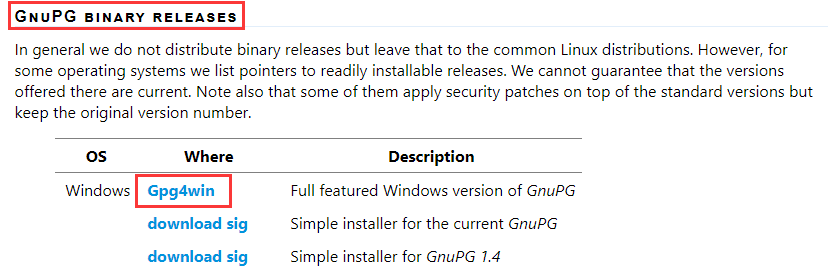
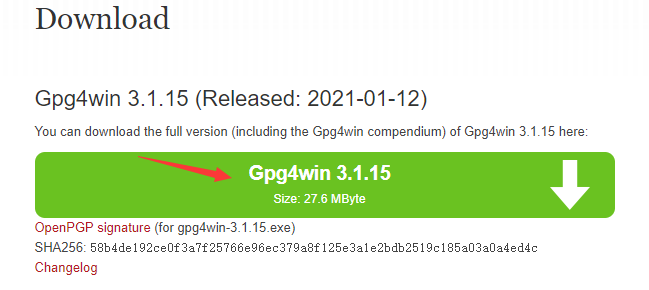
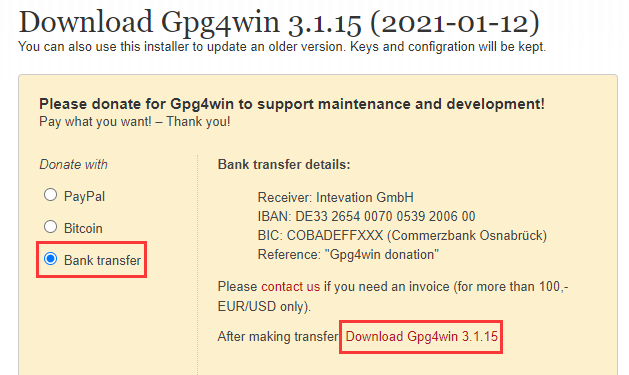
点击这里下载并安装GPG工具,按照下图中指示下载安装程序
生成一个新的密钥
首先,我们需要生成一个带有个人信息的 GPG 密钥。
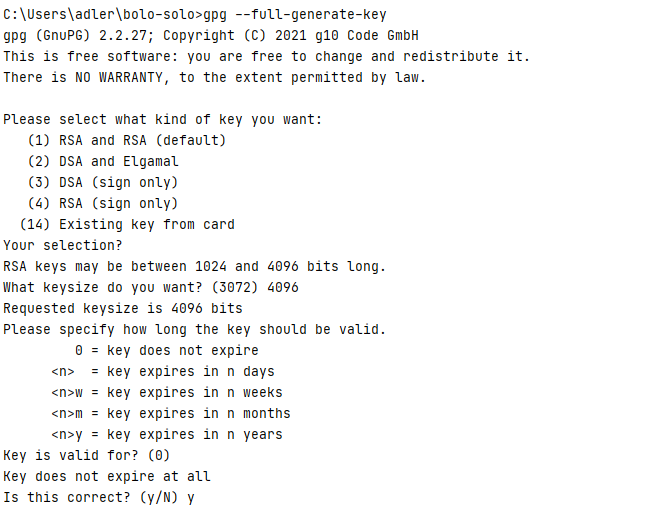
生成密钥
1gpg --full-generate-key
- 首先 GPG 会询问生成何种加密类型的密钥,
直接按回车,默认 RSA and RSA 方式即可
- 询问密钥位数,
输入 4096 后按回车(GitHub 仅接受 4096 位及以上的位数,安全性更强)
- 询问密钥的过期时间,我们一般是不希望密钥过期的,
直接按回车默认不过期即可
- 询问 “Is this correct?”确认信息输入无误后,
输入 y 并回车
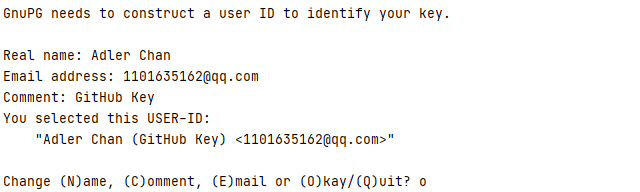
输入个人信息
确认信息无误后,还需要一些你的个人信息。
- 询问
Real name,填写你的英文名后回车提交即可(可以和 GitHub 的用户名不同)
- 询问
Email address,一定要填写在你的 GitHub 中认证过的邮箱地址
- 询问
Comment,备注,填写 GitHub Key(随便填都可以)
- 按 o (英文字母)并回车,保存更改
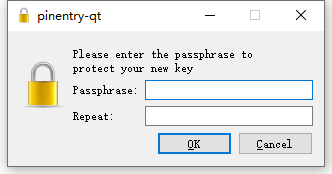
设置密码
在设置个人信息后,你的电脑会弹出一个密码输入窗口,输入两次相同的密码,为密钥设置密码(一定要记住密码)
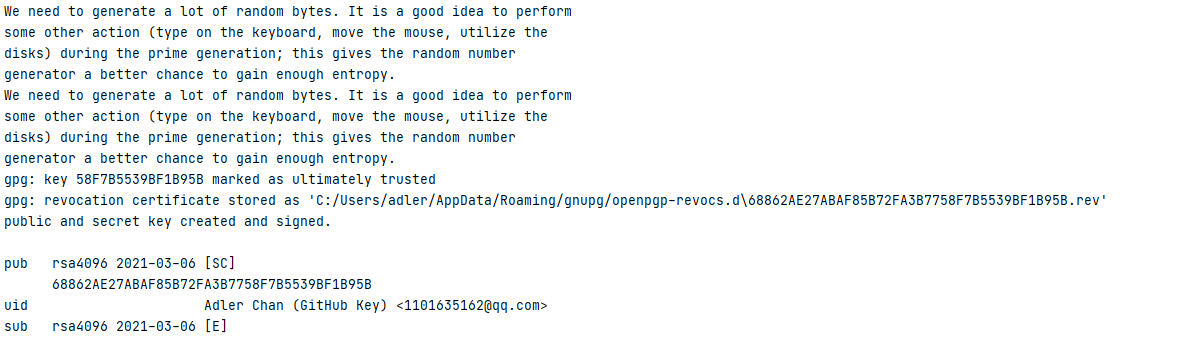
生成完毕
等待证书生成完成(如果生成的很慢,可以在终端里随便按一些英文字母,随便滑两下鼠标,给密钥生成提供一些随机熵)
将密钥绑定至 GitHub
输入命令获取你的 GPG Key ID
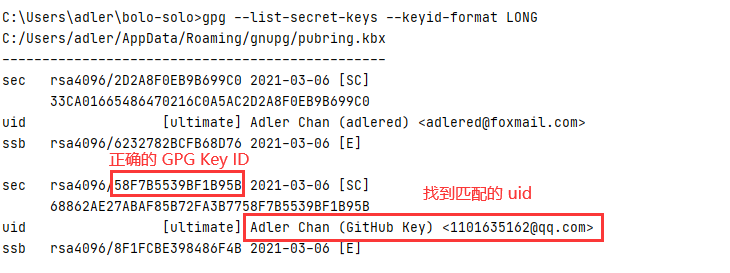
1gpg --list-secret-keys --keyid-format LONG
找到 uid 行和你刚刚设置的信息相同的字段,在 uid 行的上一 sec 行找到你的 GPG Key ID,本次实验的 GPG Key ID 为 58F7B5539BF1B95B,记住它,一会我们要用到几次
导出完整公钥
使用命令
1gpg --armor --export [GPG Key ID]
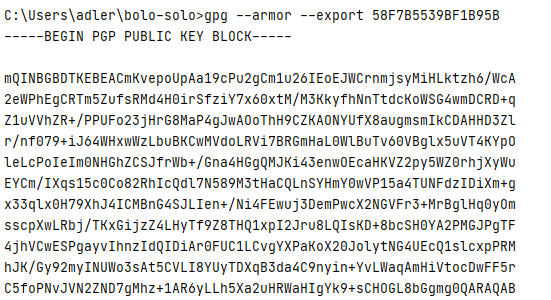
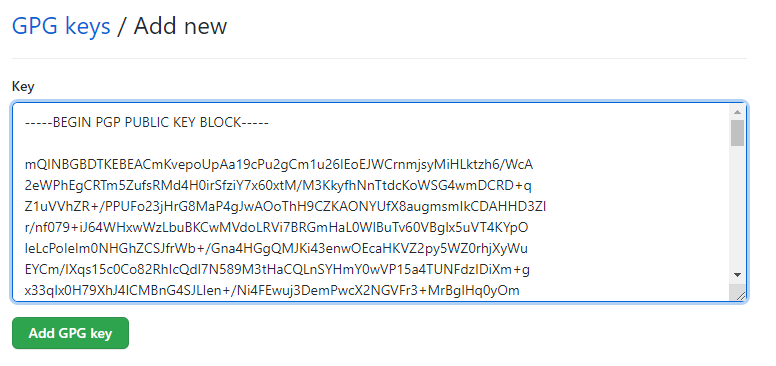
会生成一段很长的公钥内容,将从 -----BEGIN PGP PUBLIC KEY BLOCK----- 开头,以 -----END PGP PUBLIC KEY BLOCK----- 为结尾(包括这两行)的内容复制下来
将公钥放到 GitHub 中
进入 GitHub,访问你的用户设定界面
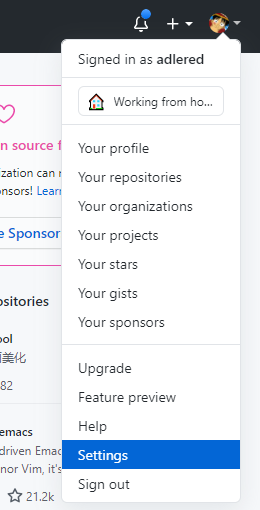
找到 SSH and GPG Keys 选项卡,点击 New GPG key 按钮(不要点错,不要点错,不要点错)
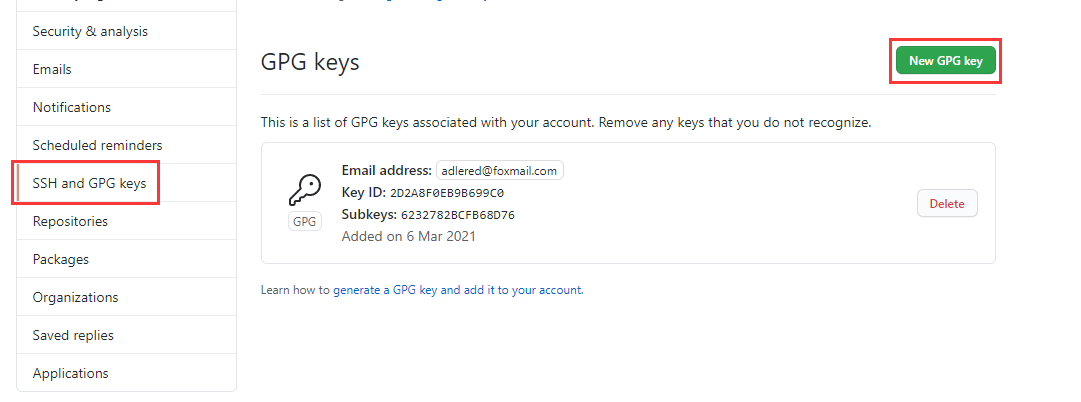
粘贴公钥并保存

将密钥绑定至本地 Git
IDEA 调用的是本地的 Git,所以将 Git 直接配置好 GPG Key 即可。
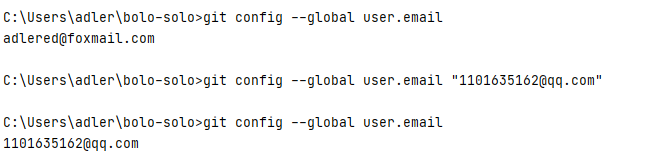
确定 Git 设定的邮箱是否正确
使用命令 git config --global user.email 查看当前 git 命令所使用的邮箱地址,如果不对,请使用 git config --global user.email "新的邮箱地址" 进行更新。
为 Git 指定 GPG Key ID
还记得刚刚查询的 GPG Key ID 吗?让 git 知道它该使用这个 GPG Key。
1git config --global user.signingkey [你的 GPG Key ID]

将所有本地 Commit 默认使用 GPG 进行签名
如果不操作本步骤,默认的 commit 还是会直接跳过签名,你可以通过在 commit 时加入 -S 参数来临时使用 GPG 进行签名。
1git config --global commit.gpgsign true

指定 GPG 程序所在位置
Git 每次 commit 需要向 GPG 程序查找你的 GPG Key,由于新版 GPG 程序的程序目录有变更,Git 程序可能会找不到它而报错,使用命令
1git config --global gpg.program "C:\Program Files (x86)\GnuPG\bin\gpg.exe"

文中设定的 gpg.exe 所在位置可能和你安装的位置不同,请仔细核对后设定。
测试
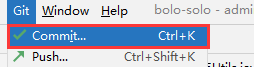
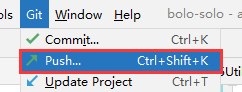
一切就绪,在你的 IDEA 中进行一次 Commit,并且 Push 到 GitHub 中试试吧:
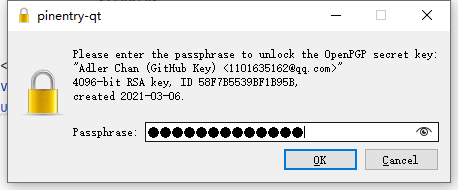
每次 Commit 都需要验证密钥的密码进行验证:
再 Push 到 GitHub 试试看:

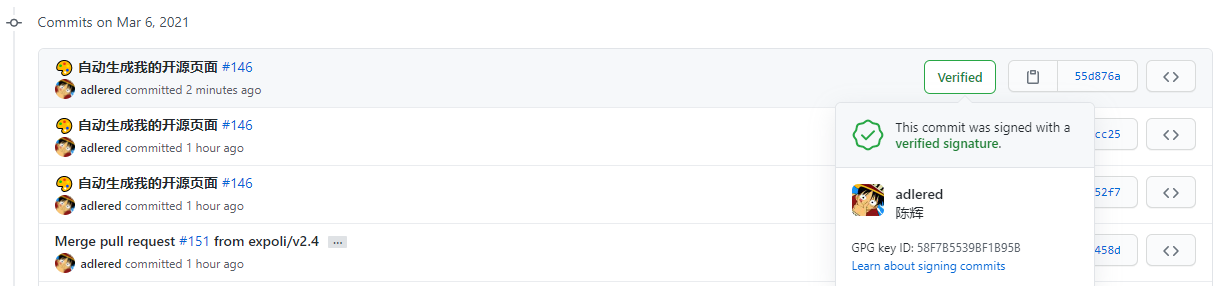
加密成功,赞。
后语
官方文档原文:
You can sign your work locally using GPG or S/MIME. GitHub will verify these signatures so other people will know that your commits come from a trusted source. GitHub will automatically sign commits you make using the GitHub web interface.
您可以使用 GPG 或 S/MIME 在本地签名您的作品。GitHub 将验证这些签名,以便其他人知道您的提交来自受信任的来源。GitHub 在您使用 GitHub Web 时将自动对 Commits 进行签名。